Have you ever wanted to analyze data from Wikipedia but didn't want to manually copy-paste tables? Web scraping allows you to automatically extract tables and other data - opening up interesting analysis opportunities.
In this post, we'll walk through a hands-on example of scraping Wikipedia to get data on all US presidents. Along the way, we'll learn web scraping concepts that will be useful for non-programmers and beginners alike.
Why Would You Want to Scrape Wikipedia Data?
There are a few great reasons to scrape Wikipedia:
We'll focus on the last point in this post - learning foundational concepts that can be applied to all kinds of web scraping tasks.
Use Case: Analyzing Data on US Presidents
Let's say we want to analyze data on every US president - their party affiliation, years in office, VP, etc. Rather than manually compiling this, we could scrape Wikipedia's list of presidents to get a structured dataset.
This is the table we are talking about
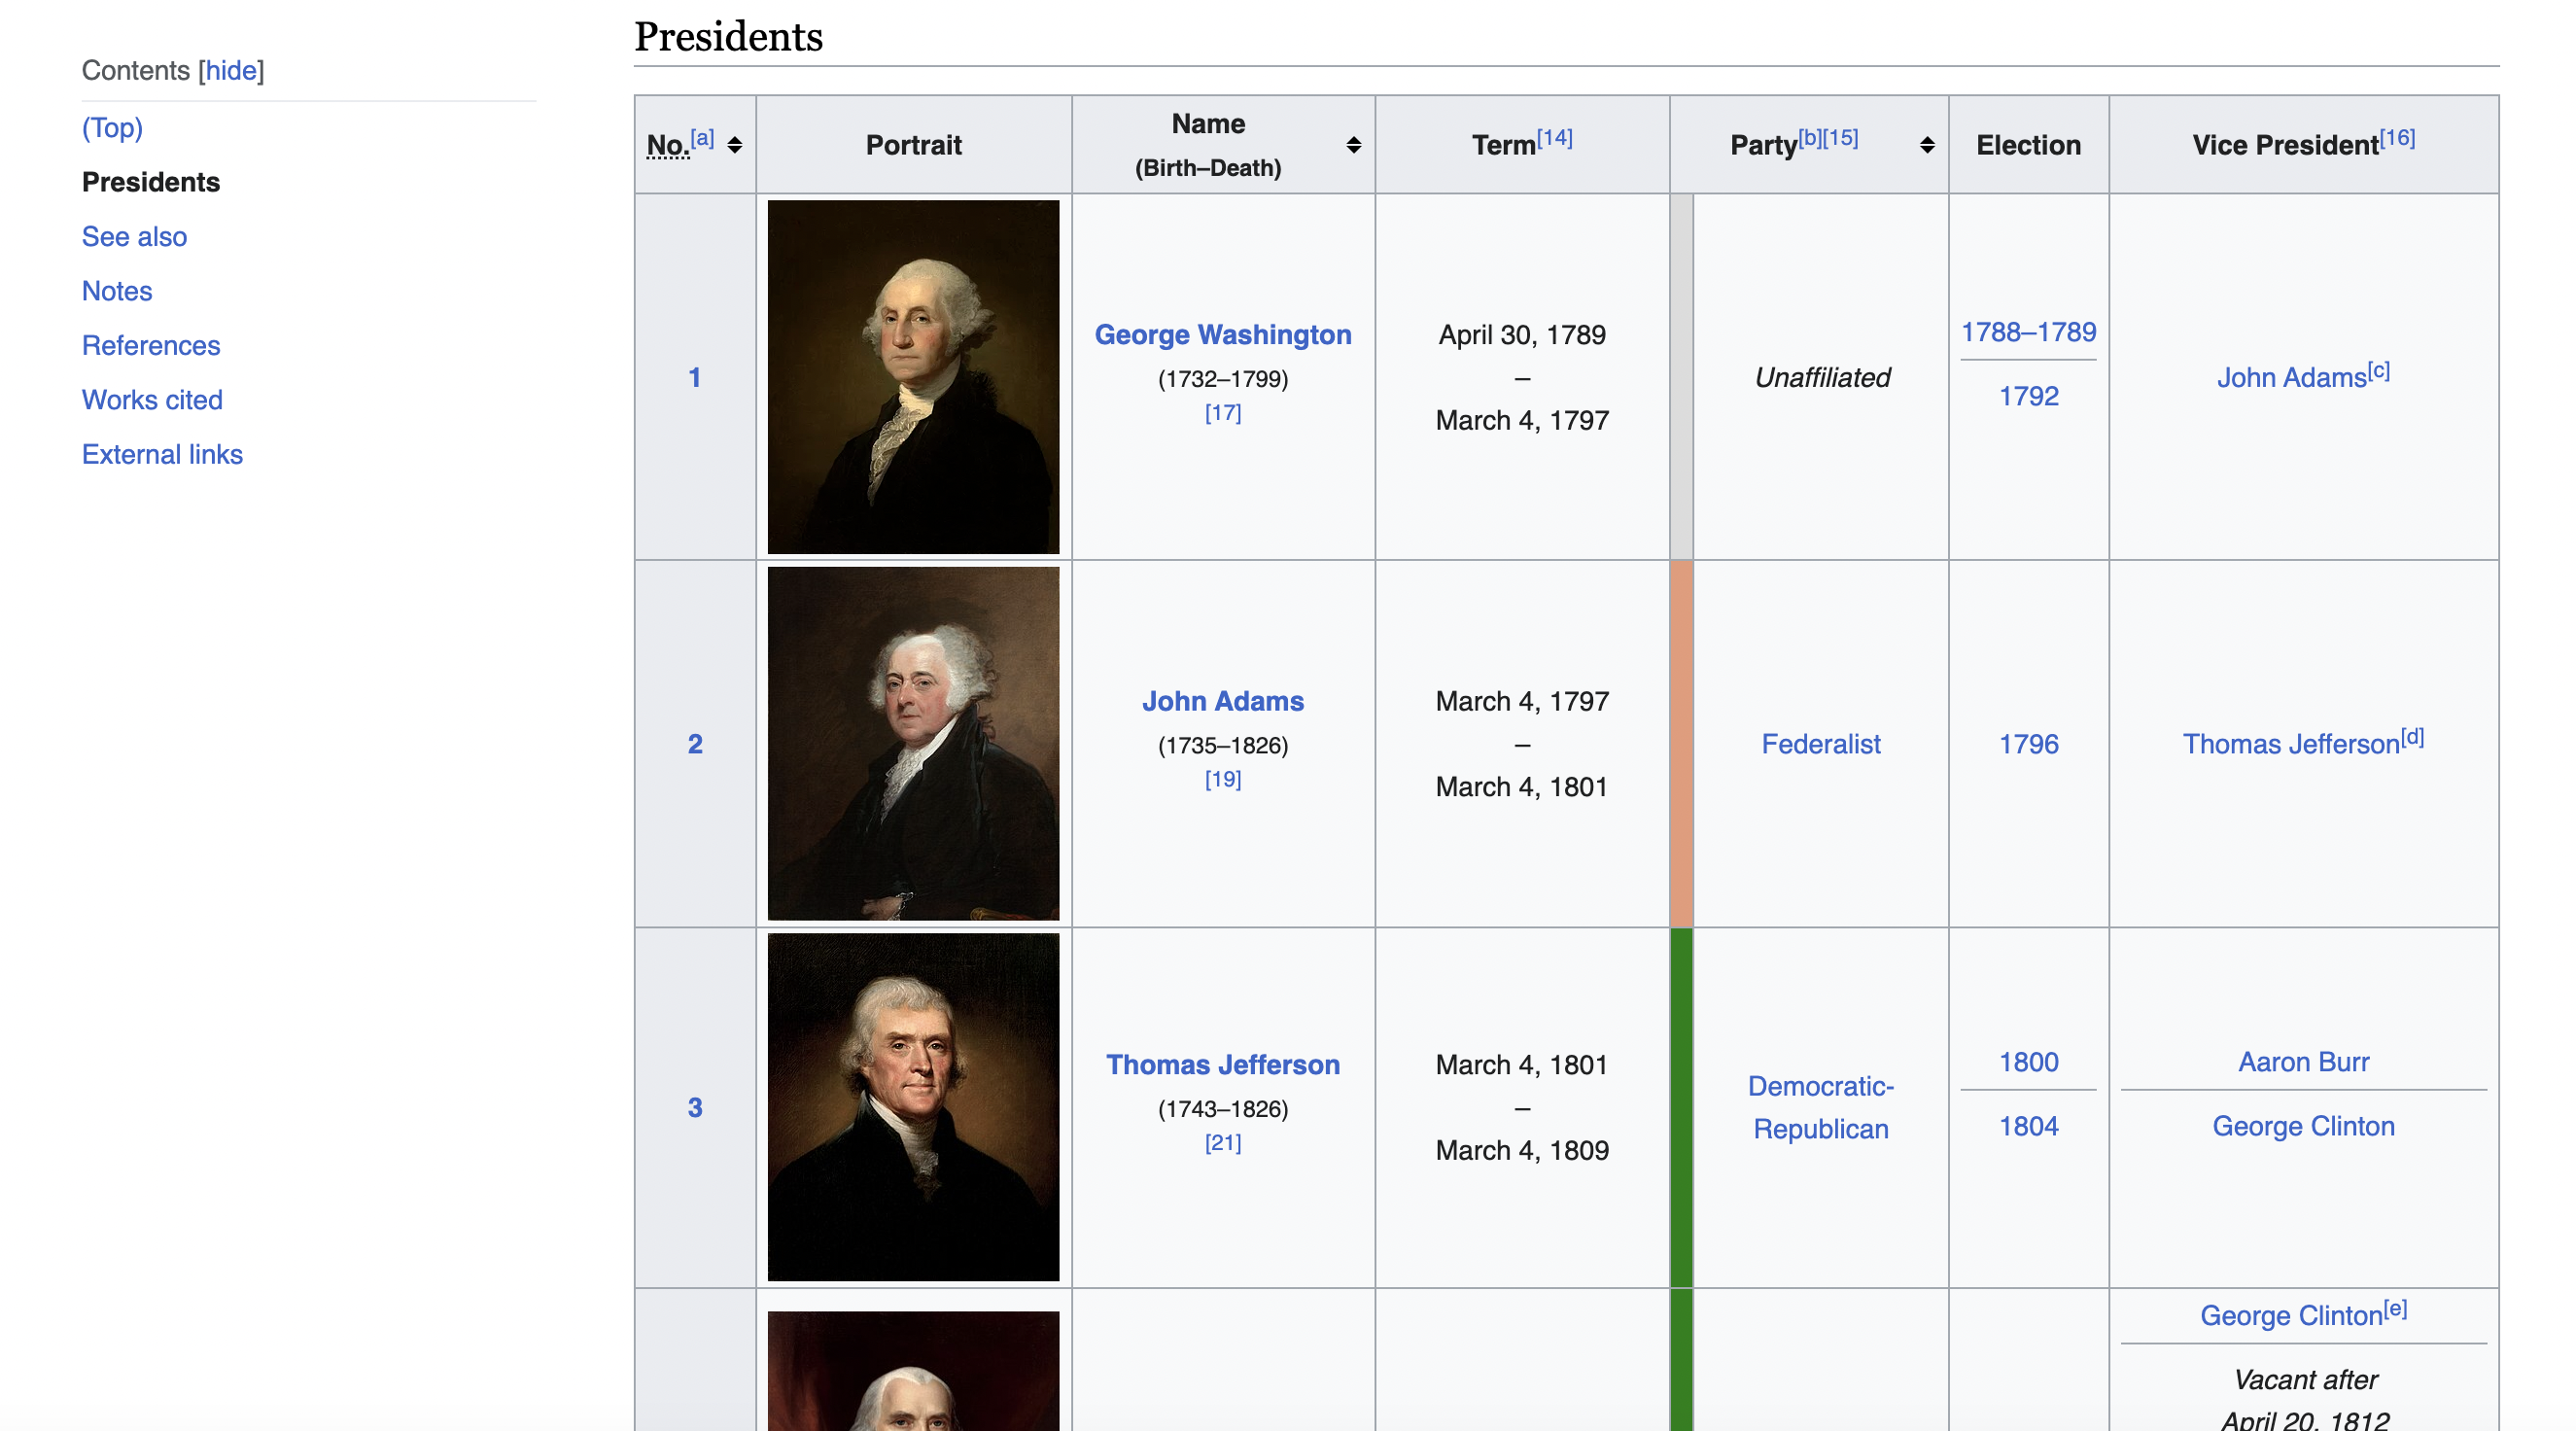
Our goal is to extract the table row for each president into an easy-to-analyze format like CSV.
This example will illustrate several key concepts like:
These concepts can be applied to many other web scraping tasks as well.
First, you'll need to add the following dependencies to your
[dependencies]
reqwest = "0.11"
select = "0.5"
Step 1: Import Modules and Define Constants
Let's walk through the code snippet by snippet:
use reqwest::header;

use select::document::Document;

use select::node::Node;

use select::predicate::{Name, Attr, Class};
We first import modules that we'll need later:
We also import some helper predicates from select that can identify elements by name, class, attributes etc.
Next, we define constants:
#\\[tokio::main\\]

async fn main() -> Result<(), reqwest::Error> {

let url = "<https://en.wikipedia.org/wiki/List_of_presidents_of_the_United_States>";
The
We define the Wikipedia URL to scrape as a constant
Step 2: Make HTTP Request with Custom User Agent
Next, we'll make the HTTP request to fetch the Wikipedia page HTML:
let user_agent = "Mozilla/5.0 (Windows NT 10.0; Win64; x64) AppleWebKit/537.36 (KHTML, like Gecko) Chrome/58.0.3029.110 Safari/537.36";

let client = reqwest::Client::builder()
    .default_headers({
        let mut headers = header::HeaderMap::new();
        headers.insert(header::USER_AGENT, header::HeaderValue::from_static(user_agent));
        headers
    })
    .build()?;

let response = client.get(url).send().await?;
This does a few interesting things:
So with a few lines of code, we've made an asynchronous HTTP request posing as a real browser!
Step 3: Verify Response and Parse HTML
Next, we ensure the request succeeded and parse the HTML:
if response.status().is_success() {

    let body = response.text().await?;

    let document = Document::from_read(body.as_bytes())?;

} else {
   println!("Failed to retrieve the web page. Status code: {:?}", response.status());
}
This:
Now we can query elements within this Document using CSS selectors.
Step 4: Extract Target Table
Inspecting the page
When we inspect the page we can see that the table has a class called wikitable and sortable
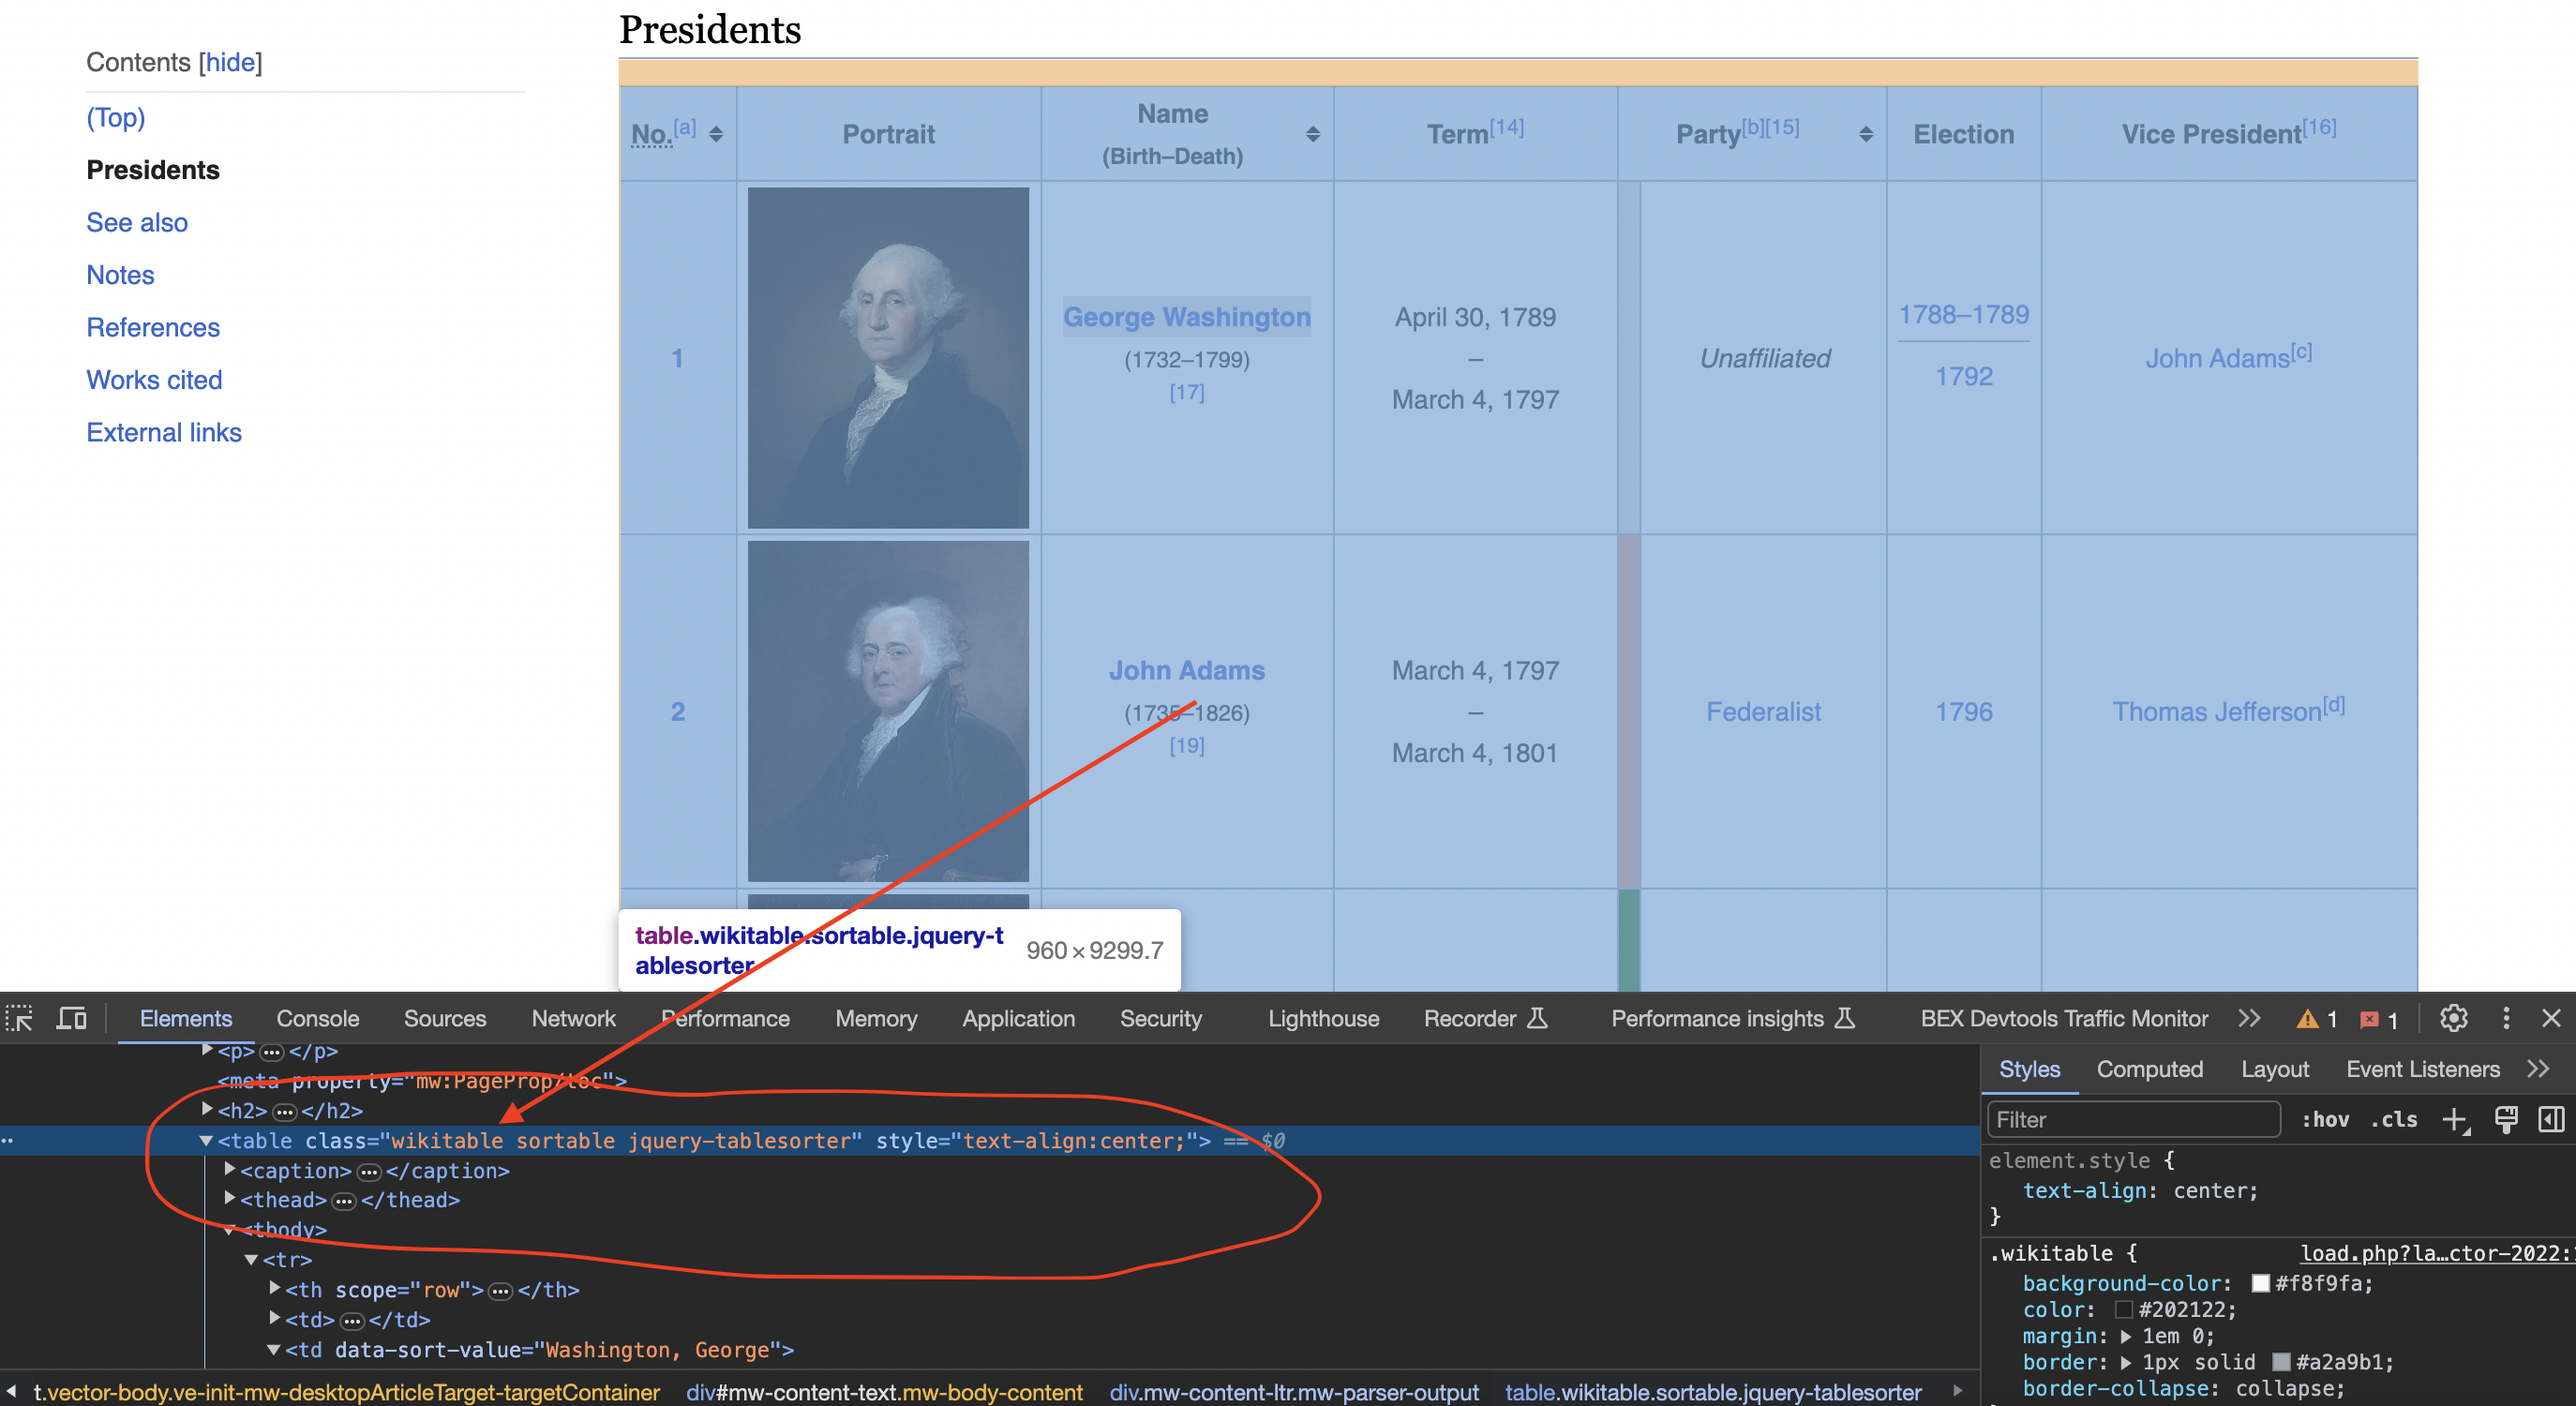
let table = document.find(Class("wikitable"))
    .next()
    .unwrap();
Here we use the
Step 5: Loop Through Rows and Store in Vectors
Now we can traverse this table node to extract data rows into vectors:
let mut data: Vec<Vec<String>> = Vec::new();

for row in table.find(Name("tr")).skip(1) {

    let mut row_data: Vec<String> = Vec::new();

    for col in row.find(Name("td"))
        .chain(row.find(Name("th"))) {

        row_data.push(col.text());
    }

    data.push(row_data);
}
This:
So data is a 2D vector storing each row's presidential data.
Step 6: Print Scraped Data
Finally, we can print the structured president data:
        for president_data in data {
            println!("President Data:");
            println!("Number: {}", president_data[0]);
            println!("Name: {}", president_data[2]);
            println!("Term: {}", president_data[3]);
            println!("Party: {}", president_data[5]);
            println!("Election: {}", president_data[6]);
            println!("Vice President: {}", president_data[7]);
            println!();
        }
And we've successfully extracted the table into an easy-to-process format!
From here, you could:
Full Code to Scrape Wikipedia President Data
use reqwest::header;
use select::document::Document;
use select::node::Node;
use select::predicate::{Name, Attr, Class};

#[tokio::main]
async fn main() -> Result<(), reqwest::Error> {
    // Define the URL of the Wikipedia page
    let url = "https://en.wikipedia.org/wiki/List_of_presidents_of_the_United_States";

    // Create a custom User-Agent header to simulate a browser request
    let user_agent = "Mozilla/5.0 (Windows NT 10.0; Win64; x64) AppleWebKit/537.36 (KHTML, like Gecko) Chrome/58.0.3029.110 Safari/537.36";
    let client = reqwest::Client::builder()
        .default_headers({
            let mut headers = header::HeaderMap::new();
            headers.insert(header::USER_AGENT, header::HeaderValue::from_static(user_agent));
            headers
        })
        .build()?;

    // Send an HTTP GET request to the URL
    let response = client.get(url).send().await?;

    // Check if the request was successful (status code 200)
    if response.status().is_success() {
        // Parse the HTML content of the page using select
        let body = response.text().await?;
        let document = Document::from_read(body.as_bytes())?;

        // Find the table with the specified class name
        let table = document.find(Class("wikitable sortable")).next().unwrap();

        // Initialize empty vectors to store the table data
        let mut data: Vec<Vec<String>> = Vec::new();

        // Iterate through the rows of the table
        for row in table.find(Name("tr")).skip(1) {
            let mut row_data: Vec<String> = Vec::new();
            for col in row.find(Name("td")).chain(row.find(Name("th"))) {
                row_data.push(col.text());
            }
            data.push(row_data);
        }

        // Print the scraped data for all presidents
        for president_data in data {
            println!("President Data:");
            println!("Number: {}", president_data[0]);
            println!("Name: {}", president_data[2]);
            println!("Term: {}", president_data[3]);
            println!("Party: {}", president_data[5]);
            println!("Election: {}", president_data[6]);
            println!("Vice President: {}", president_data[7]);
            println!();
        }
    } else {
        println!("Failed to retrieve the web page. Status code: {:?}", response.status());
    }

    Ok(())
}
Hopefully walking through this code gave you insight into real-world web scraping! Some next steps would be:
In more advanced implementations you will need to even rotate the User-Agent string so the website cant tell its the same browser!
If we get a little bit more advanced, you will realize that the server can simply block your IP ignoring all your other tricks. This is a bummer and this is where most web crawling projects fail.
Overcoming IP Blocks
Investing in a private rotating proxy service like Proxies API can most of the time make the difference between a successful and headache-free web scraping project which gets the job done consistently and one that never really works.
Plus with the 1000 free API calls running an offer, you have almost nothing to lose by using our rotating proxy and comparing notes. It only takes one line of integration to its hardly disruptive.
Our rotating proxy server Proxies API provides a simple API that can solve all IP Blocking problems instantly.
Hundreds of our customers have successfully solved the headache of IP blocks with a simple API.
The whole thing can be accessed by a simple API like below in any programming language.
curl "http://api.proxiesapi.com/?key=API_KEY&url=https://example.com"We have a running offer of 1000 API calls completely free. Register and get your free API Key here.
Browse by tags:
Browse by language:
The easiest way to do Web Scraping
Get HTML from any page with a simple API call. We handle proxy rotation, browser identities, automatic retries, CAPTCHAs, JavaScript rendering, etc automatically for you
Try ProxiesAPI for free
curl "http://api.proxiesapi.com/?key=API_KEY&url=https://example.com"
<!doctype html>
<html>
<head>
<title>Example Domain</title>
<meta charset="utf-8" />
<meta http-equiv="Content-type" content="text/html; charset=utf-8" />
<meta name="viewport" content="width=device-width, initial-scale=1" />
...
Don't leave just yet!
Enter your email below to claim your free API key: